Article which showcases usage of beads in homemade making of jewelry
Making beaded jewelery is a fun hobby. You can delight friends and family members with the creative and attractive pieces of jewelry you have made for them. Here are a few projects that you might be interested in.
Shades of Blue Necklace
Materials needed:
1. blue glass beads (light and dark, make sure sizes are different)
2. a few Swarovski crystals, twenty at the most.
3. small scissors
4. beading wire
5. three strand clasp
6. crimp beads
7. chain nose pliers
First, you will need to determine the length of your necklace because this will be a 3 strand floating design. Set the beads in front of you and arrange them so that they are in the order that they will appear on the necklace. Mix up the color of the beads as you make the necklace. It will not look as beautiful if you leave too many of the same color together. Also, be sure to space out your crystals. Don't put too many of them next to each other.
The 3 strand design will allow you to fashion strands that are different lengths. Most of the time, this is done from shortest to longest. After the beading wire has been cut, you can put your 3 strands through the clasp. The amount of space that separates the beads is critical. You might want to use a ruler to help you with this. Another important issue is to make sure that the strands you create do not all look the same. That would be a disaster.
After you have decided on the amount of space that will be between each bead, start the process of placing the beads onto each strand. The crimp beads will be used to separate the crystals and glass beads. Keep doing it this way until you come to the end of each strand. At that point, you should put the end of the wire through the remaining half of the clasp.
Moon Drop Earrings
Materials needed:
1. 4mm white beads and 2mm silver beads, both should be round
2. round nose pliers
3. silver spacers
4. wire cutters
5. chain nose pliers
6. ear wires
7. 3mm jump rings
8. flat beads with an oval shape
Take one white and one silver round bead and place them on an eye pin. You should create the loop at the end, then place the wire inside the ear wire before sealing it. The spacer should then be placed on the eye pin, after which you will make a loop at the top, then seal it. Using a jump ring, attach the top of one segment to the bottom of another. Take another jump ring and put it through an oval flat bead. Then put it through the bottom of the segment that came before it. After that, you can seal the jump ring.

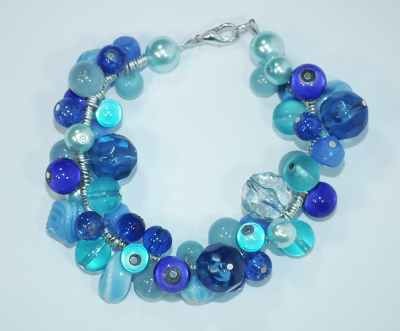
Marble Flush Bracelet
Materials needed:
1. Twenty to twenty-six triangular glass beads with a swirl on them
2. Five to seven smaller glass beads with a swirl on them
3. wire cutters
4. chain nose pliers
5. silver beading wire
6. crimping pliers
Attach one end of the clasp, then string the beads in a row of three or four of the larger beads, followed by a small bead. Do the same process for the entire bracelet, then you can fasten the opposite clasp. The triangle shape of the beads will enable them to fit together for a very interesting look.
Drop Earring
Materials needed:
1. any beads that you like
2. two ear wires
3. two head pins
4. round nose pliers
These are very simple to make. Take the head pin and place a few beads on it. Make sure they are not alike and use spacers if you want. Start the loop by bending the head pin ninety degrees with the pliers. Finish the loop by bending the end of the head pin around.

I hope you have enjoyed these ideas. Have fun and good luck with your beading in the future!
Source and inspiration: FeelInspired - Online Beads Shop